I've been ordering more parts and making adjustments where needed. My leg to body hubs came from James (aka Commando8) together with a mounting bracket for the dome drive motor. It took some adjustment to get the hubs to fit as the shin mounting blocks were in the way.
This is the dome drive motor. I'm trying to make the wiring modular, hence the connector on the end of the cable.
Trying to think ahead, I decided to make some wiring clips out of two different sized p-clips. I think they'll work out quite well.
I ordered the NPC-2212 foot drive motors from www.Robotmarketplace.com and they arrived really quickly.
Finally, Jerry Greene sent out my outer legs and ankles which arrived today. They are truly fantastic. This is one of the legs after I've fitted some of the other parts to it.
I've ordered some of the hardware to fit the ankles and shoulder horseshoes to the legs then I'll mount them on the body. I also have to fit a mount for the dome drive spring to get that working then I'll be able to test the drive using the radio control unit. That will be his first remotely operated moving part.
Monday, 6 June 2011
Monday, 9 May 2011
More parts and painting practice
Another late update. I've been busy with various parts of R2. Where to begin.
The parts are still coming in. I've ordered more items from Jerry Greene including the outer legs and feet. I've also added the foot drives which will hold the NPC motors when I can get them. I've bought foot strips which are the bare aluminium strips on the fronts and backs of the feet, the battery box harnesses, ankle cylinders, wedges and cylinder holders.. I've also bough leg to body hubs and a dome motor bracket from James AKA COM8. I'm sure as this blog goes on all of these strangely named parts will become apparent to those who are not fellow R2 builders.
The battery harnesses.
I managed to get the Pittman dome drive motor working with my radio system using a SyRen10a speed controller. The wiring took a bit of figuring out but I got there in the end.
SyRen10a
Connected to the Pittman motor and dome drive wheel
I then ordered a rattle can of Fiat 899 blue. Unfortunately when it came it wasn't metallic. I thought I'd give the colour a try anyway so I decided to use the panels from my styrene dome. They turned out OK.
So now I'm waiting for more parts. I suppose there are some things that I can get done but a lot of it would mean that I have to strip the frame down again. I want to wait until I have more parts so that when I strip the frame down, I can modify it and fit all the next stage stuff at the same time. This includes, the dome drive bracket, front vents, utility arms and large data port.
On the dome, I'm hoping to finalise the sanding then line up the outer dome and mark out the cut-out panels on the inner dome. Then I have to cut the inner dome for things like the holo-projectors, pie panels, logic displays and PSIs.
So there's a lot of work to do but I don't want to get ahead of myself until I have the parts that I'll need to complete that stage.
The parts are still coming in. I've ordered more items from Jerry Greene including the outer legs and feet. I've also added the foot drives which will hold the NPC motors when I can get them. I've bought foot strips which are the bare aluminium strips on the fronts and backs of the feet, the battery box harnesses, ankle cylinders, wedges and cylinder holders.. I've also bough leg to body hubs and a dome motor bracket from James AKA COM8. I'm sure as this blog goes on all of these strangely named parts will become apparent to those who are not fellow R2 builders.
The battery harnesses.
I managed to get the Pittman dome drive motor working with my radio system using a SyRen10a speed controller. The wiring took a bit of figuring out but I got there in the end.
SyRen10a
Connected to the Pittman motor and dome drive wheel
I then ordered a rattle can of Fiat 899 blue. Unfortunately when it came it wasn't metallic. I thought I'd give the colour a try anyway so I decided to use the panels from my styrene dome. They turned out OK.
So now I'm waiting for more parts. I suppose there are some things that I can get done but a lot of it would mean that I have to strip the frame down again. I want to wait until I have more parts so that when I strip the frame down, I can modify it and fit all the next stage stuff at the same time. This includes, the dome drive bracket, front vents, utility arms and large data port.
On the dome, I'm hoping to finalise the sanding then line up the outer dome and mark out the cut-out panels on the inner dome. Then I have to cut the inner dome for things like the holo-projectors, pie panels, logic displays and PSIs.
So there's a lot of work to do but I don't want to get ahead of myself until I have the parts that I'll need to complete that stage.
Tuesday, 15 March 2011
Picture catch-up
Here are a few pictures of the latest work...
This is R2 sitting comfortably in my Smart car for the ride to Freds. Got some funny looks on that trip.
Above are the second-hand items I bought from Mark. I fitted the details which I had already bought into the shoulder horse-shoes and I'm over the moon with them.
Above is the Large Data Port (LDP). This is fitted just under the dome and above the utility arms at the front. Unfortunately this doesn't fit. I'll have to take some of the material from the frame to allow this to be fitted.
Another picture showing the detail of the shoulder horse-shoes. Unfortunately, I don't have the main legs yet to fit them to but it's coming together.
This is the coin slots fitted to the inner skin. I only fixed them in with 2 bolts for the time being. They will have to be removed at some point for painting so they are a temporary fit.
The logistics of the build are quite a lot to think about. Buying or making the parts is one thing but the order in which they go together is quite another. I won't be able to attach the out skins and doors until I have all of the body details as there cuts to make in the skins and fixings to hide like the bold heads for the coin slots. It's proving expensive at the moment simply because a lot of the parts which are large and required to make the overall robot are being made and sold to the club members and if I don't buy them now it could be a couple of years before they are made again. I have already ordered the legs and ankles. The foot drives are in the process of being paid for and I think Jerry may be making the feet next. I feel that in purchasing these items, I can get R2 looking like he should and then I'll be able to concentrate on some of the details. Of course, then it's time to start on the electronics!
This is R2 sitting comfortably in my Smart car for the ride to Freds. Got some funny looks on that trip.
Above are the second-hand items I bought from Mark. I fitted the details which I had already bought into the shoulder horse-shoes and I'm over the moon with them.
Above is the Large Data Port (LDP). This is fitted just under the dome and above the utility arms at the front. Unfortunately this doesn't fit. I'll have to take some of the material from the frame to allow this to be fitted.
Another picture showing the detail of the shoulder horse-shoes. Unfortunately, I don't have the main legs yet to fit them to but it's coming together.
This is the coin slots fitted to the inner skin. I only fixed them in with 2 bolts for the time being. They will have to be removed at some point for painting so they are a temporary fit.
The logistics of the build are quite a lot to think about. Buying or making the parts is one thing but the order in which they go together is quite another. I won't be able to attach the out skins and doors until I have all of the body details as there cuts to make in the skins and fixings to hide like the bold heads for the coin slots. It's proving expensive at the moment simply because a lot of the parts which are large and required to make the overall robot are being made and sold to the club members and if I don't buy them now it could be a couple of years before they are made again. I have already ordered the legs and ankles. The foot drives are in the process of being paid for and I think Jerry may be making the feet next. I feel that in purchasing these items, I can get R2 looking like he should and then I'll be able to concentrate on some of the details. Of course, then it's time to start on the electronics!
Monday, 14 March 2011
More work and more parts
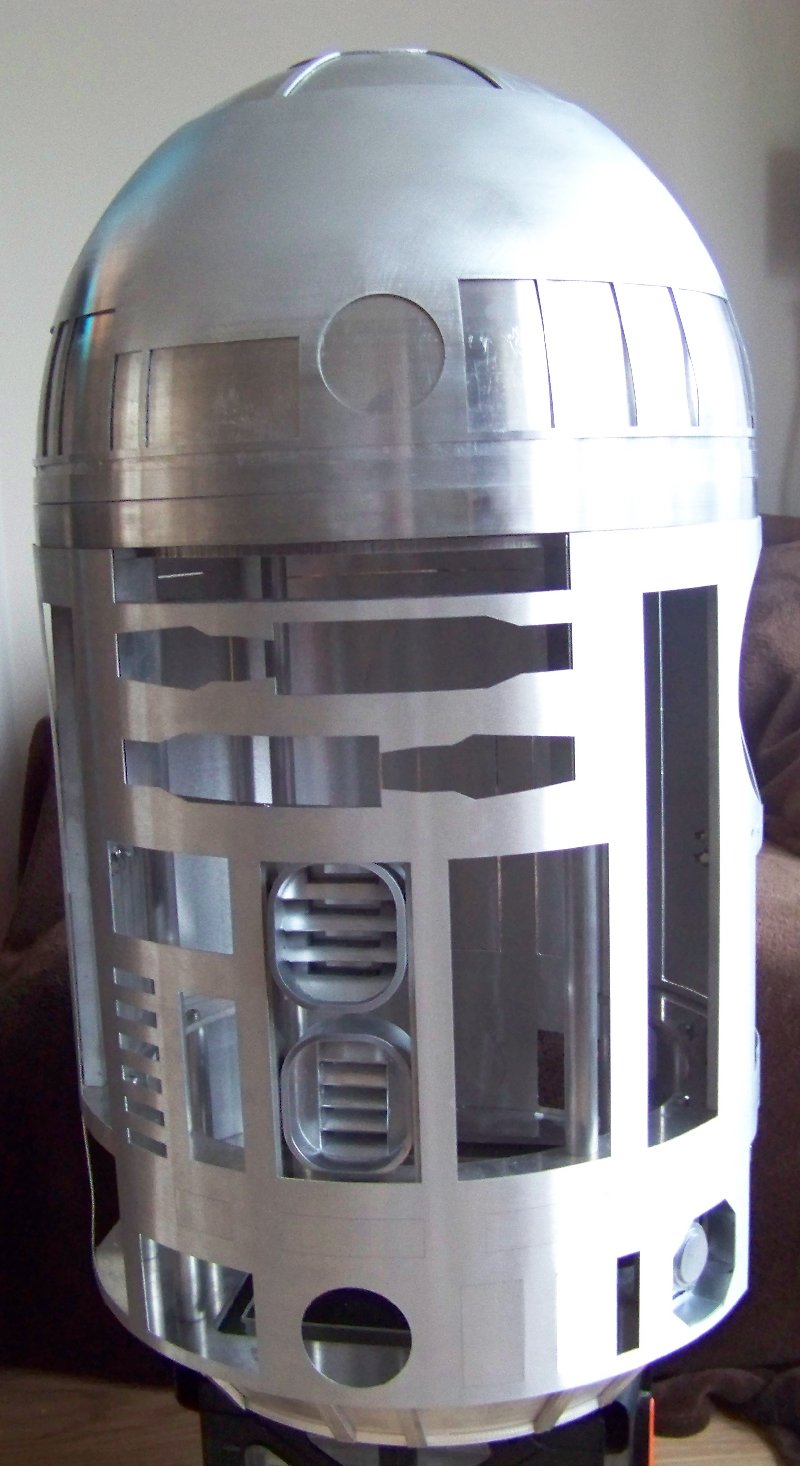
I've been sanding the dome like a madman and all of the panels too. It would appear that I may never be fully rid of the spin lines but they are seriously reduced now. Took R2 to Freds again on Wednesday. We re-aligned the skins, fitted the skirt and milled a small amount off the dome baseplate so the dome sits better over the top.
I was recently lucky in that a fellow builder called Mark advertised some aluminium parts on the forum and I managed to snap some of the parts up. I'm hoping to post some photos of the parts and progress tomorrow.
Saturday, 29 January 2011
Mock-Up
Couldn't help doing another mock-up with the frame, the inner skin and the dome. It's noticeable that the dome is in the middle of being sanded at this stage. Also, the front vents and the octagon port are my resin ones just hanging in there to fill the spaces.
Inner skins mounted
After fitting my mounting brackets, I ordered some more stainless nuts and bolts to continue. I fitted the skin snaps to the brackets then the inner skins to the skin snaps. Here's how it turned out...
On the next picture you can see how the skins can be removed for maintenance...
Then clipped back in when the tinkering is done...
These incredble skin snaps are made from nylon by Daren Murrer of the R2 Builders group.
On the next picture you can see how the skins can be removed for maintenance...
Then clipped back in when the tinkering is done...
These incredble skin snaps are made from nylon by Daren Murrer of the R2 Builders group.
Thursday, 27 January 2011
Dome sanding and skin mounts
I've been doing a lot of dome prep work. I marked and removed all of the panels from the outer dome and de burred the edges. I then set to work sanding the spin lines out of the outer dome. It's hard work. To take a break tonight, I thought I'd attach the skin mounting brackets that I made from aluminium angle.
First I traced the shape of the frame ring against the aluminium then cut and filed them to shape. This gave me two of these...
I then mocked up the inner skins around the frame which allowed me to see what height I was going to mount the brackets.
Once I Drilled through the side plates and attached the brackets, I offered the skin snaps up and I found that there were two moulded pieces on the back that prevented them from sitting flush. I took my current favourite file and filed off the offending pieces. Before and after pic here...
So they fit a lot better now.
So now I've ordered some more stainless steel hardware to continue the skin mounting part of the build and I'll continue with the dome sanding. More to come soon.
First I traced the shape of the frame ring against the aluminium then cut and filed them to shape. This gave me two of these...
I then mocked up the inner skins around the frame which allowed me to see what height I was going to mount the brackets.
Once I Drilled through the side plates and attached the brackets, I offered the skin snaps up and I found that there were two moulded pieces on the back that prevented them from sitting flush. I took my current favourite file and filed off the offending pieces. Before and after pic here...
So they fit a lot better now.
So now I've ordered some more stainless steel hardware to continue the skin mounting part of the build and I'll continue with the dome sanding. More to come soon.
Subscribe to:
Posts (Atom)