Saturday, 29 January 2011
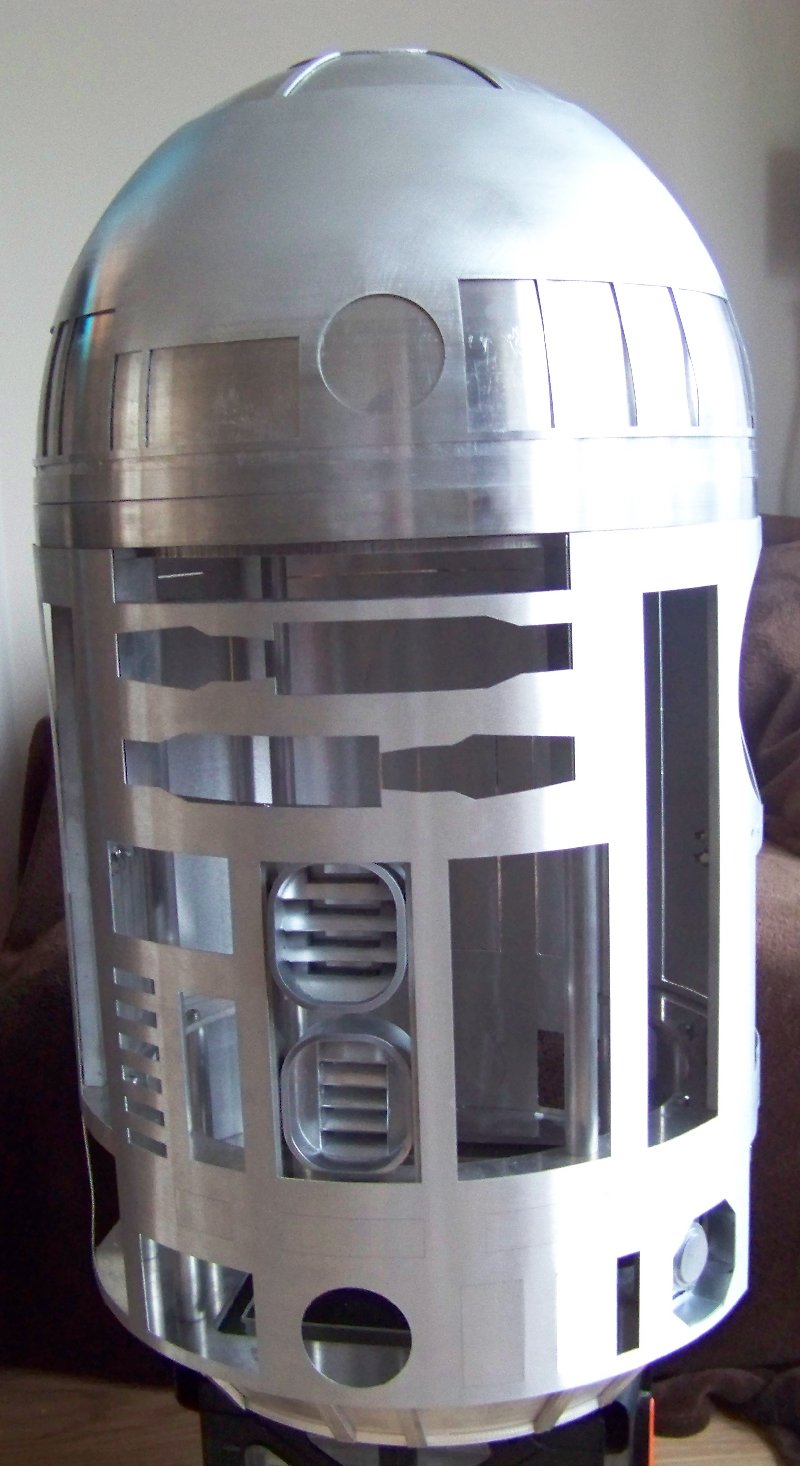
Mock-Up
Couldn't help doing another mock-up with the frame, the inner skin and the dome. It's noticeable that the dome is in the middle of being sanded at this stage. Also, the front vents and the octagon port are my resin ones just hanging in there to fill the spaces.


Inner skins mounted
After fitting my mounting brackets, I ordered some more stainless nuts and bolts to continue. I fitted the skin snaps to the brackets then the inner skins to the skin snaps. Here's how it turned out...

On the next picture you can see how the skins can be removed for maintenance...

Then clipped back in when the tinkering is done...

These incredble skin snaps are made from nylon by Daren Murrer of the R2 Builders group.

On the next picture you can see how the skins can be removed for maintenance...

Then clipped back in when the tinkering is done...

These incredble skin snaps are made from nylon by Daren Murrer of the R2 Builders group.
Thursday, 27 January 2011
Dome sanding and skin mounts
I've been doing a lot of dome prep work. I marked and removed all of the panels from the outer dome and de burred the edges. I then set to work sanding the spin lines out of the outer dome. It's hard work. To take a break tonight, I thought I'd attach the skin mounting brackets that I made from aluminium angle.
First I traced the shape of the frame ring against the aluminium then cut and filed them to shape. This gave me two of these...

I then mocked up the inner skins around the frame which allowed me to see what height I was going to mount the brackets.

Once I Drilled through the side plates and attached the brackets, I offered the skin snaps up and I found that there were two moulded pieces on the back that prevented them from sitting flush. I took my current favourite file and filed off the offending pieces. Before and after pic here...

So they fit a lot better now.

So now I've ordered some more stainless steel hardware to continue the skin mounting part of the build and I'll continue with the dome sanding. More to come soon.
First I traced the shape of the frame ring against the aluminium then cut and filed them to shape. This gave me two of these...

I then mocked up the inner skins around the frame which allowed me to see what height I was going to mount the brackets.

Once I Drilled through the side plates and attached the brackets, I offered the skin snaps up and I found that there were two moulded pieces on the back that prevented them from sitting flush. I took my current favourite file and filed off the offending pieces. Before and after pic here...

So they fit a lot better now.

So now I've ordered some more stainless steel hardware to continue the skin mounting part of the build and I'll continue with the dome sanding. More to come soon.
Saturday, 15 January 2011
Slow work
There's been a lot of unseen work going on with R2. I've also had a 300mm dome kit delivered. This is excellent but will take a lot of prep work to get finished. Here it is sitting on top of the frame...

For the casual fan, the main part of the dome will remain bare aluminium while most of the panels will be painted blue. I test fitted one of the painted resin holoprojectors in the from just to see what it was like and I was very pleased with the result. Here's a closer picture...


For the casual fan, the main part of the dome will remain bare aluminium while most of the panels will be painted blue. I test fitted one of the painted resin holoprojectors in the from just to see what it was like and I was very pleased with the result. Here's a closer picture...

Friday, 17 December 2010
Parts. Parts. Parts.
I've been collecting a number of resin parts and I took the plunge and painted them using Plasti-kote brilliant metallic. I have to say that the results were impressive. Not due to my painting skills, far from it, but due to the finish of the paint. The next picture is one of the leg struts and a shoulder button next to their respective aluminium counterparts.

This is one of the holoprojectors I bought from Don Jarr on ebay...

I've also been working on the frame with Fred. The universal arm carrier (UAC) has been fitted along with the speaker rails.

On the top of the frame sits the Rockler bearing which is what will connect the dome to the frame and allow it to spin. On top of the Rockler bearing is a dome base plate by Jerry Green aka JAG. Jerry is a droid building genius. He designed the frame I built and supplies aluminium parts through the builders club. Here's a picture of the aluminium skirt...

Next duty is to countersink all of the UAC fixings, tap the spindles which will attach the skirt to the frame and mount the Rockler bearing to the frame.

This is one of the holoprojectors I bought from Don Jarr on ebay...

I've also been working on the frame with Fred. The universal arm carrier (UAC) has been fitted along with the speaker rails.

On the top of the frame sits the Rockler bearing which is what will connect the dome to the frame and allow it to spin. On top of the Rockler bearing is a dome base plate by Jerry Green aka JAG. Jerry is a droid building genius. He designed the frame I built and supplies aluminium parts through the builders club. Here's a picture of the aluminium skirt...

Next duty is to countersink all of the UAC fixings, tap the spindles which will attach the skirt to the frame and mount the Rockler bearing to the frame.
Friday, 22 October 2010
It started a long time ago etc etc....
This is the start of my blog chronicling the build of my full-sized R2-D2s. That's right, plural. I started looking at plans and measurements about ten years ago but family commitments made me put the project on hold. I then started looking around again about a year ago and found a wonderful forum http://astromech.net which gave me so much inspiration I just had to get started. I was initially going to use styrene sheet to build the robot and made a start but was soon bitten by what's known as "Aluminium Fever" in the droid building world and began collecting parts made in aluminium. So, I think a fully functioning aluminium 3-legged droid is on the cards and a static display styrene droid will accompany it.
Anyway, I'll be adding pictures and comments as I go so feel free to look in.
 The above picture is my first styrene leg made to Dave Everetts plans. They are available from the R2 Builders group on Yahoo.
 These are John Sherrells excellent aluminium skins. There are four rolled aluminium panels already laser cut. Eventually, when the panels are popped out, it all gets bonded together, an inner and outer for the front and the same for the back. This will give it strength and the doors the correct recesses. More on that later.
 These are the frame rings made from aluminium. They are cut by water jet by a company near me to the plans by master droid builder Jerry Greene (aka JAG).
 Together with these uprights and a couple of other panels, the main frame for R2 was constructed.

The main frame constructed. I enlisted the help of a friend of mine, Fred Todd, who used to be my metalwork teacher in high school. He helped me drill and tap the holes to fit it all together.
Anyway, I'll be adding pictures and comments as I go so feel free to look in.


The main frame constructed. I enlisted the help of a friend of mine, Fred Todd, who used to be my metalwork teacher in high school. He helped me drill and tap the holes to fit it all together.
Subscribe to:
Posts (Atom)